Editor Guide
Select an Image
- Edit an element that has a Super Image Markers field.
- Click Select image or use the upload button if uploads are enabled.
- Choose an image asset from the modal, or upload one to the configured volume.
- The image will appear in the field preview.
Only image assets should be selectable.
Add a Marker
- Select an image first.
- Click Add marker.
- Choose the related entry from the Craft entry selector.
- A round marker appears in the center of the image.
- Drag the marker to the correct position.
The marker coordinates update automatically as percentages.
Move a Marker
Drag a marker to a new position on the image.
The marker cannot be moved outside the image bounds. Its X/Y values are clamped between 0 and 100.
Select an Entry for a Marker
There are two ways to assign or change an entry:
- Double-click the marker on the image.
- Click the edit icon in the table row.
After selecting an entry, the table row shows the entry title and stores the entry ID.
Choose Marker Colors
Use the color control in the marker table to change a marker's color.
The image marker and the table swatch update immediately. The saved value is a hex color such as #d92828.
Sort Markers
Drag the handle at the start of a table row to reorder markers.
The table order is saved and is the same order returned by imageMarker.markers.all() on the frontend.
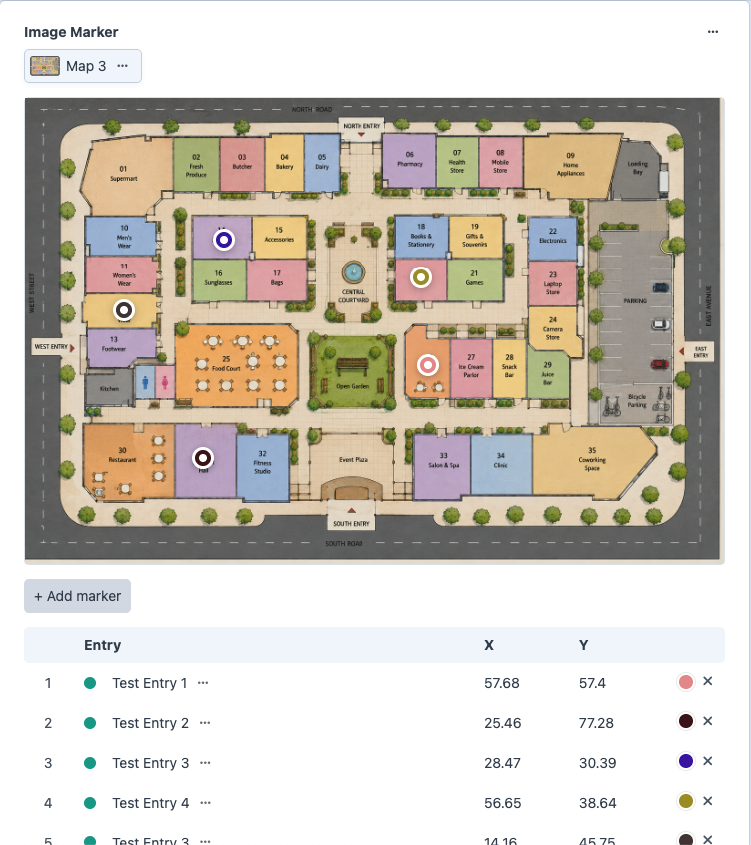
Review the Marker Table
The table below the image shows:
- Sort handle and marker number.
- Selected entry title, status, and edit icon.
- Marker color control.
- X percentage.
- Y percentage.
- Remove control.
Use this table for a quick audit before saving the element.
Remove a Marker
Click the remove icon in the marker table row.
Removing a marker deletes that marker's coordinates and entry relation from the field value. It does not delete the related entry.
Save the Element
Save the element as usual. The field stores:
- The selected image ID.
- All markers in their current order.
- Each marker's coordinates.
- Each marker's color.
- Each marker's selected entry ID.
Editing Tips
- Add the image first, then markers.
- Place markers near the visual center of the thing they describe.
- Use the table to confirm every marker has the expected entry.
- Use distinct marker colors when several markers are close together.
- Sort markers in the order frontend users should encounter them.
- If the image changes substantially, review all marker positions before saving.